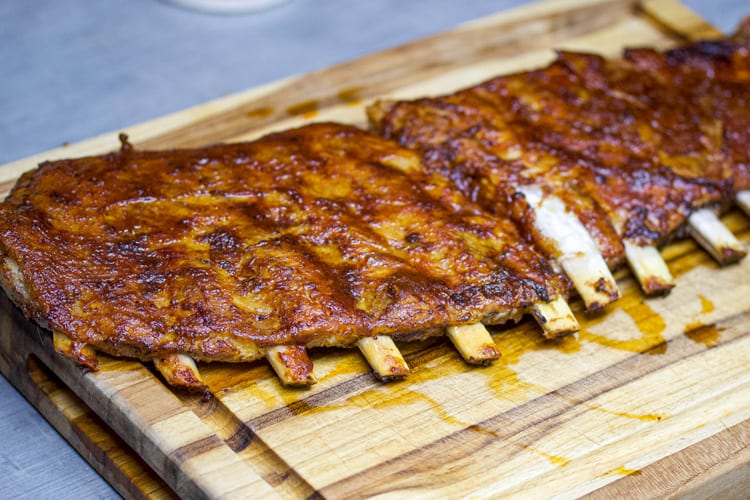
These sous vide baby back ribs will send your taste buds straight to Valhalla. And we don’t say that lightly…
For this cook, we use our secret blend of spices to elevate the flavor of the baby back ribs. We promise this will send you on a one way ticket to Flavortown. Then at the final moments we coat the ribs with BBQ sauce for a delicious glazed finish.

Thanks to the sous vide, the days of cooking dry spare ribs, St. Louis style ribs, baby back and country style ribs are over. Do yourself a favor and make this recipe stat.
Removing the Membrane
The membrane is a piece of tissue that is attached to the underside of the pork rib. Unlike the connective tissue, the membrane does not soften when cooked. Therefore, we want to remove that baby to ensure the ribs don't have any tough, chewy sections.

Here's how you do it:
- At the edge of the rack, slide a small knife under the membrane and over a bone.
- Loosen the membrane by pulling up with the knife.
- Next, grab the edge of the membrane with a paper towel and pull it off. Note it may not come off in one whole piece, so remove it in smaller pieces if necessary.
For a step by step explanation with pictures, go here.
And voila! Your ribs are ready for seasoning and cooking now.
Packaging
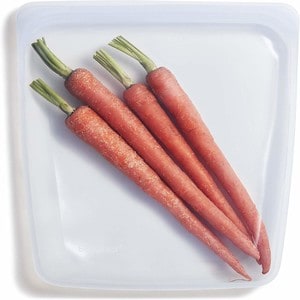
An essential part of the sous vide process is putting ingredients in an air-tight bag or container. The two most common techniques to package your ingredients are vacuum sealing and using the water displacement method.
A vacuum sealer removes all the air and seals the contents in a plastic bag through a vacuum. This process ensures the food is airtight and properly sealed, and prevents the bag from floating which can result in uneven cooking. If you are in the market for a vacuum sealer, I’d recommend the Anova sealer.
The displacement method is a technique where you first place your food and marinades in a sous vide bag, submerge the bag in a container of water, and allow the pressure to force all the air out of the bag.
Either method works for ribs. Note that if you are adding a marinade in the bag, please make sure your vacuum sealer is capable of sealing liquids. If not, please use the displacement method.
Baby Back Rib Time and Temperature
Through loads of experimentation, we’ve found that cooking baby back ribs at 74C/165F for 12 hours is the perfect combo. Leaving the pork ribs in for 12 hours breaks down the connective tissue (collagen), which results in an extremely tender rack of ribs. Also, cooking it at a temperature of 165F is the sweet spot for juicy, delicious baby back ribs.

Just make sure you have a reliable sous vide that accurately regulates the temperature of the bath or your results may vary (check out the Anova or Joule). For other time and temperature options, check out our cooking guide here.
Can You Sous Vide Frozen Ribs?
The quick answer is, absolutely! Cooking frozen foods sous vide is an ultra convenient, safe way to prepare your protein. Just take the food directly from the fridge, repackage it (unless you know the bag is sous vide safe) and let the sous vide work its magic.
Generally the only thing you’ll need to adjust is the cook time. However, since we are already cooking the baby back pork ribs sous vide for 12 hours there is no need to add on any additional time.
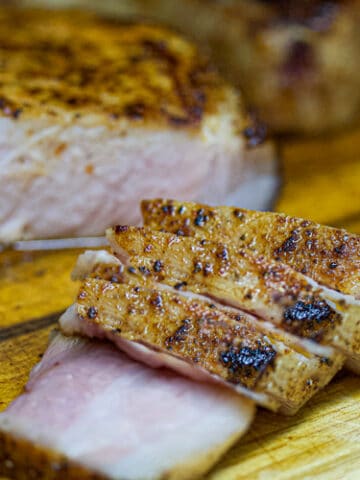
Best Way to Sear Ribs After Sous Vide
Searing is by far the most important step in cooking sous vide. If want your food to look like it is Michelin star quality, you are going to have to get a rich sear on it. Failing to do so will make your dinner guests wonder why they let you cook again.
If you want an amazing sear, you’ve got to:
1. Pat the meat completely dry with a paper towel
2. Season generously with salt or seasoning of your choice
3. Sear at extremely high temperatures.
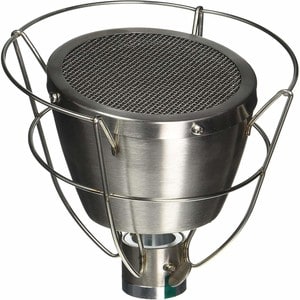
At this point you want to determine the best searing method. For ribs, we suggest broiling, grilling or using a searing torch. The trick is getting the oven, grill or torch extremely hot, then searing for 3 - 5 minutes. This results in a quick, high-quality sear without overcooking the ribs.
Once the ribs are seared, coat them in your favorite bbq sauce and put them back on the grill or under the broiler for another 2 minutes.
Special Equipment
Sous Vide Machine – This one is obvious. To cook sous vide, you’re going to need a device to precisely regulate the temperature of the bath water. The two best sous vide machines in the game right now are the Anova Precision Cooker and the Breville Joule.
The main difference between the two is that with the Anova you can control the device both manually and with a mobile device, and with the Joule you can only control the device by using your mobile device. Either way, both sous vide machines are top class and you can’t go wrong with either choice.
12-quart Container – Although you can use a basic stockpot for your sous vide cooking needs, I highly recommend buying a large plastic container. They are inexpensive and spacious, so you won’t have to worry about cooking a big roast in a small pot. I recommend a 12 quart Rubbermaid container, as it is BPA free, sturdy, and large enough for just about anything you will be cooking.
Container Lid – If you are going to buy a plastic container, I highly suggest buying a compatible lid for it. When you sous vide for a long duration, the heat of the water causes evaporation. With a lid, it eliminates a majority of the evaporation so you can cook for hours care-free.
Cast Iron Skillet – If you are looking to take your searing game to the next level, we recommend investing in a cast iron skillet. By using a cast iron in this recipe, you’ll achieve a deep sear on the protein. Cast irons are also extremely handy for searing just about any and all sous vide meat. Lodge offers the best quality and price, which is why it is our favorite cast iron brand.
Next Level Sous Vide –Looking to take your sous vide skills to the next level? The Next Level Sous Vide eCookbook will push your culinary boundaries with 65 delicious recipes that are equally approachable and tasty. With pro tips and a detailed explanation of the sous vide process, you will be on your way to maximize your sous vide skills.
Check out our full list of recommended gear here.
Sous Vide Baby Back Ribs
Ingredients
- 2 racks baby back ribs
- 1 tablespoon paprika
- 1 tablespoon chili powder
- 1 tablespoon cumin
- 1 tablespoon dark brown sugar
- 1 tablespoon pepper
- 1 tablespoon salt
- ½ teaspoon cayenne pepper
Instructions
Preparation
Set sous vide machine to 74C/165F.
Remove the membrane from the backside of the rack of ribs. Do this by sliding a table knife under the membrane anywhere along the rack. Lift and loosen it with the knife until you can grab it with a paper towel. Pull it off the ribs; it should peel away in one large sheet, but if it breaks, use the knife to restart at another section.
Lightly season the rack of ribs with salt. Put the ribs in a freezer bag, and remove the air through a vacuum sealer or the displacement method. Note: the ribs may have to be cut in half to fit in to bag. Place rack of ribs in the bath, and cook for 12 hours.
Take ribs out of the bath and pat dry with paper towel. Combine chili powder, paprika, cumin, brown sugar, pepper, salt and cayenne pepper in a small bowl, then season generously on both sides.
Finishing
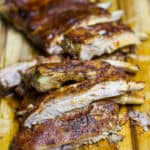
Turn grill on high. Place ribs on grill, meat side down, for 5 minutes. Flip the ribs over and coat the top with your favorite BBQ sauce. After 2-3 more minutes, take the ribs off the grill and coat with BBQ sauce again. Let rest for 5 minutes, and enjoy the most tender, flavorful ribs of your life!
Alternative instruction - If you do not have a grill, you can also finish the ribs in the oven. Set oven to 350F, and bake for 10 minutes. Take ribs out and coat the rack with your favorite BBQ sauce. Turn on broiler and place ribs back in oven for 2-3 more minutes. Take the ribs out of the oven and coat with BBQ sauce again. Let rest for 5 minutes, and enjoy!


Wow!! These were the best ribs I've made. The seasoning is perfect and they were perfectly tender. Thank you for the recipe!
Fabulous recipe. They came out perfect. Had a little trouble with pulling the membrane off of one rack—easily came off the other two—but they were a great success.
Thank you, I'm so glad to hear! Those membranes can get the best of me from time to time as well. Sometimes I get it all in one try, and sometimes I'm hacking away for 10 minutes lol.
These ribs can win awards! Family was too happy with these.
Thanks Jason for the easy to follow recipe. I am tying the ribs for dinner tonight
Excited for you, Jeff! Let me know how it goes.
This are the best ribs I've ever made. Used baby back ribs and they came out so juicy.
I would like to know how you bagged up the racks of ribs. Half the racks in separate bags?
If you are using gallon-sized bags then you will most likely have to half the rack and put them in separate bags. If you have a vacuum sealer, there are a couple "invent-a-size" options that allow you to create a bag large enough for the full rack.
Blown away by these ribs. Super delicious and tender.
Thanks for sharing. Have you ever tried seasoning the ribs before you sous vide them? It seems to me like they would be more flavorful that way but I haven’t tried.
I have! A lot of the seasoning will come off during the sous vide process due to the moisture in the bag, so it causes a lot of wasted seasoning. If you were to season it before, make sure to let it sit on the meat for a few hours prior to the flavors can penetrate the ribs and make it worth it. Enjoy!
Best ribs I've ever made
Deeeelicious!! Perfection! Husband finally loosing his skepticism with sous vide & is now an avid fan, “Best ribs I’ve ever had,”
I was wondering if I could smoke my baby back ribs after putting them in the sous vide? How long and at what temperature should I first cook them in the sous vide
Then how long in the smoker?
ditto on all the 5 stars, this is the only way we eat ribs now, have fixed them for dinner guests and they were blown away