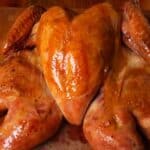
Can you make an entire Thanksgiving turkey in the sous vide? The answer is 100% yes, AND we would definitely do it again.
Making a whole turkey via sous-vide doesn’t have to be intimidating. This foolproof turkey cooks at 65.5 °C (150 °F) for 6 hours, yielding wonderfully tender, juicy meat that stays moist until you’re ready to serve.
Updated November 2025- with overcoming common turkey problems, suggested serving & gravy ideas.
At a Glance
- Cut: Whole Turkey (Spatchcocked)
- Temperature: 150 °F / 65.5 °C
- Cook Time: 6 hours
- Finish: High-heat oven roast until skin is golden brown
- Notes: Dry-brined overnight, yields moist, juicy meat and crisp skin
With a simple spatchcock prep and overnight dry brine, you’ll get even cooking and deep flavor — then a quick high-heat roast crisps the skin to holiday perfection. Perfect for festive dinners or when you want a guaranteed crowd-pleaser without the dryness.
This is not the typical turkey most of us are used to getting at our Thanksgiving dinner. You know, the kind while being asked if it is too dry, you shake your head NOOOO and say, “it’s perfect.”
Meanwhile, you are secretly strategizing how much gravy you can pour on without taking the whole boat.
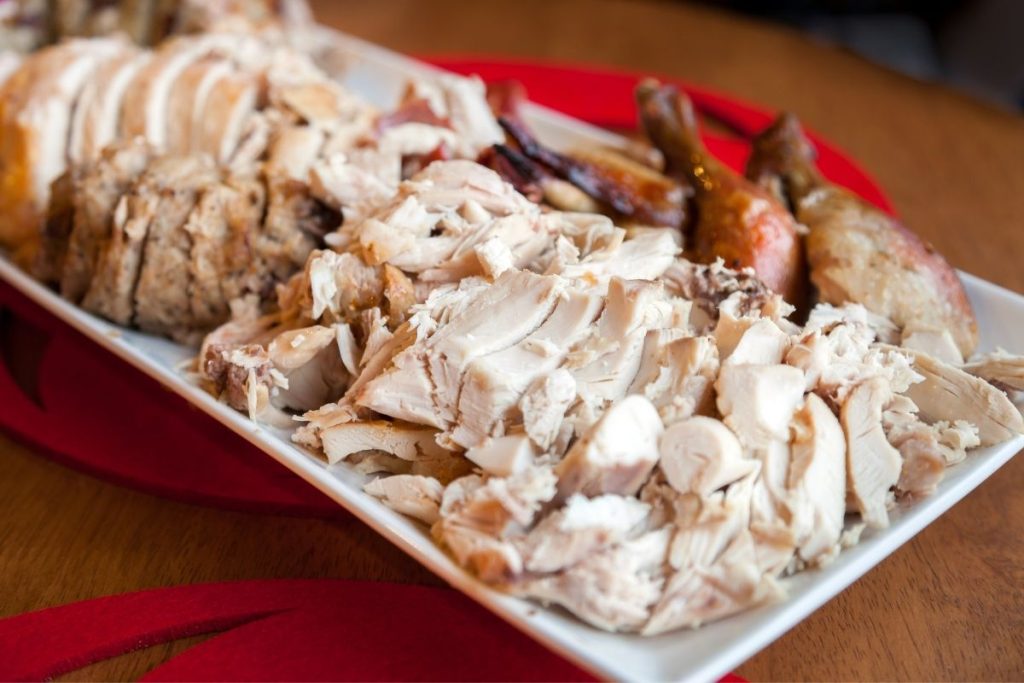
This is nothing like that turkey. This sous vide turkey is moist, tender, juicy, and sure to be a party pleaser.
Our aim was to have a semi-traditional whole turkey that we could carve at the table. Of course, you can get better results if you were to separate the turkey (white and dark meat) and cook it at the desired temperature for each. But that’s not what we’re going for here.
Combining our previous experience, we decided to go with a spatchcock turkey (to avoid filling the cavity with liquid, thereby saving time), dry brined overnight, and sous vide the day of.
We finished our bird in a hot oven. However, it could probably be finished in a deep fryer … for those of you who are allowed to try by your significant other.
For the full video and the recipe to a smashing sous vide cranberry sauce, check out Kind of Cooking on youtube:
Time and Temperature
We found that cooking the bird at 65.5C/150F for 6 hours is the perfect combination. Leaving the bird in for 6 hours results in an extremely tender turkey. Also, cooking it at a temperature of 150F is the sweet spot for juicy, delicious Thanksgiving turkey. Just make sure you have a reliable sous vide that accurately regulates the temperature of the bath or your results may vary (check out the Anova or Joule). If you want to explore other time and temperature options, check out our cooking guide here.
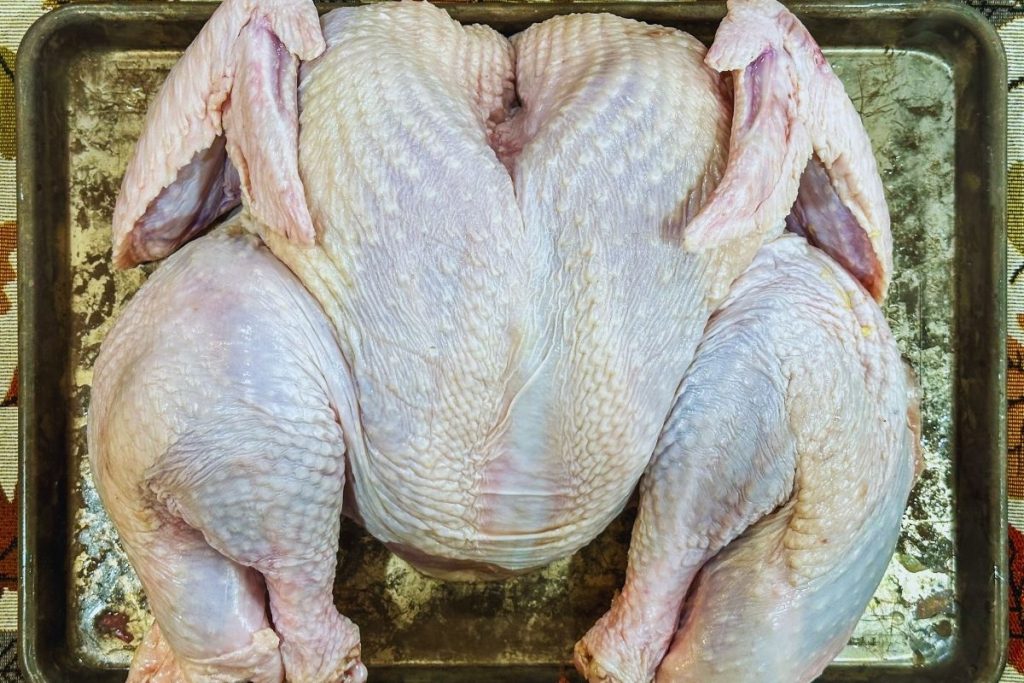
How to Spatchcock the Turkey
Spatchcocking is a preparation method that involves removing the backbone of the turkey from tail to neck so that the bird can be opened out flat. This method results in a shorter, more even cook.
The first step is removing any innards that come inside the turkey. Next, use kitchen shears to cut out the backbone, from tail to neck. Remove the wishbone - this helps with carving later. Last, flip the turkey and press down on the chest to flatten the bird. Check out a step by step guide here.
If you don't feel comfortable spatchcocking the turkey yourself, your butcher will be happy to do it for you!
Want to know how to sous vide a whole turkey? Check out our whole turkey article here.
Dry Brining the Turkey
Dry brining is the process of using salt to draw in water to the turkey, providing moister meat during the cooking process, with added flavor.
To dry brine, first separate the skin from the meat using your fingers, or other blunt utensils. Try your best to not break or tear the skin, you can make small incisions with a small sharp knife if necessary. The most important part is the breast, we recommend to do it with the thighs and drums as well.
Dry brine the turkey by salting between the skin and the meat all over. Use your hands to rub it into the meat. Once salted, place the turkey onto a wire rack over a baking sheet and dry brine uncovered in the fridge overnight.

Special Equipment
Sous Vide Machine – This one is obvious. To cook sous vide, you’re going to need a device to precisely regulate the temperature of the bath water. The two best sous vide machines in the game right now are the Anova Precision Cooker and the Breville Joule.

12-quart Container – Given the sheer size of a 10 lb turkey, I highly recommend buying a large plastic container for this cook. I recommend a 12 quart Rubbermaid container, as it is BPA free, sturdy, and large enough for just about anything you will be cooking.
Container Lid – If you are going to buy a plastic container, I highly suggest buying a compatible lid for it. When you sous vide for a long duration, the heat of the water causes evaporation. With a lid, it eliminates a majority of the evaporation so you can cook for hours care-free.
FoodSaver Rolls - Finding a bag that can fit a 10 lb bird is not an easy feat. The best solution we found was to use the FoodSaver Expandable Rolls. You’ll still want to double bag since there may be sharp bones that could pierce the bags.
Roasting Pan and Rack – Having a quality roasting pan for this recipe is essential. Setting the turkey on the roasting rack is key because all the juices and drippings fall down into the pan, which allows the bird to get an excellent sear in the oven. We use this stainless steel roasting pan because it’s perfect for larger roasts like prime rib roasts and turkey, and it comes with both a flat roasting rack and a V-shaped rack for flexibility.
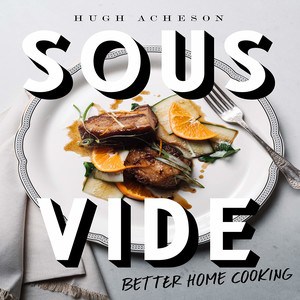
Next Level Sous Vide –Looking to take your sous vide skills to the next level? The Next Level Sous Vide eCookbook will push your culinary boundaries with 65 delicious recipes that are equally approachable and tasty. With pro tips and a detailed explanation of the sous vide process, you will be on your way to maximize your sous vide skills.

Check out our full list of recommended gear here.
Foolproof Sous Vide Thanksgiving Turkey
Ingredients
- 8-12 lb turkey, spatchcocked and dry-brined
- Kosher salt for dry brine, approx. 1 tablespoon per 4 pounds
- ¼ cup fresh sage leaves
- oil or melted butter (enough to cover turkey)
Instructions
Preparation
7 hours prior to your planned meal time, set the water bath to 150F.
Brush off excess salt from the dry brine, and place the turkey into an expandable vacuum bag. Make sure the skin side is against the smooth side of the bag. Add sage leaves to the bottom side of the turkey, then seal the bag. It’s best to double seal and double bag as there may be sharp bones sticking out.
Cook in the water bath @150F for 6 hours.
Finishing
Preheat oven to 500F.
Remove bag from bath and immediately transfer to an ice water bath to shock chill the turkey.
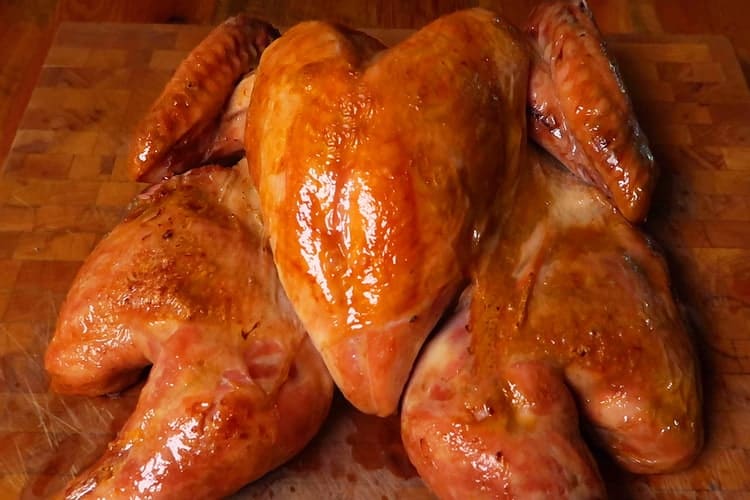
Remove the turkey from the bag, saving the juices for gravy or stock. Place on a wire rack, brush with oil or melted butter, then into a preheated 500F oven.
Cook turkey until golden brown, approximately 30 minutes. Rest for 10 minutes, then slice and serve. Enjoy!
Why This Method Overcomes Common Turkey Problems
- Dry white meat: Because sous vide cooks the bird at a lower, consistent temperature, the breast stays juicy and doesn’t dry out.
- Uncooked dark meat: The 6-hour cook plus even heat distribution means breast and thigh finish together — no danger of undercooked legs or overcooked breast.
- Uneven cooking & long roast times: Spatchcocking + sous vide = shorter total active cooking time, and oven roasting is just for crisping skin.
Suggested Serving & Gravy Ideas
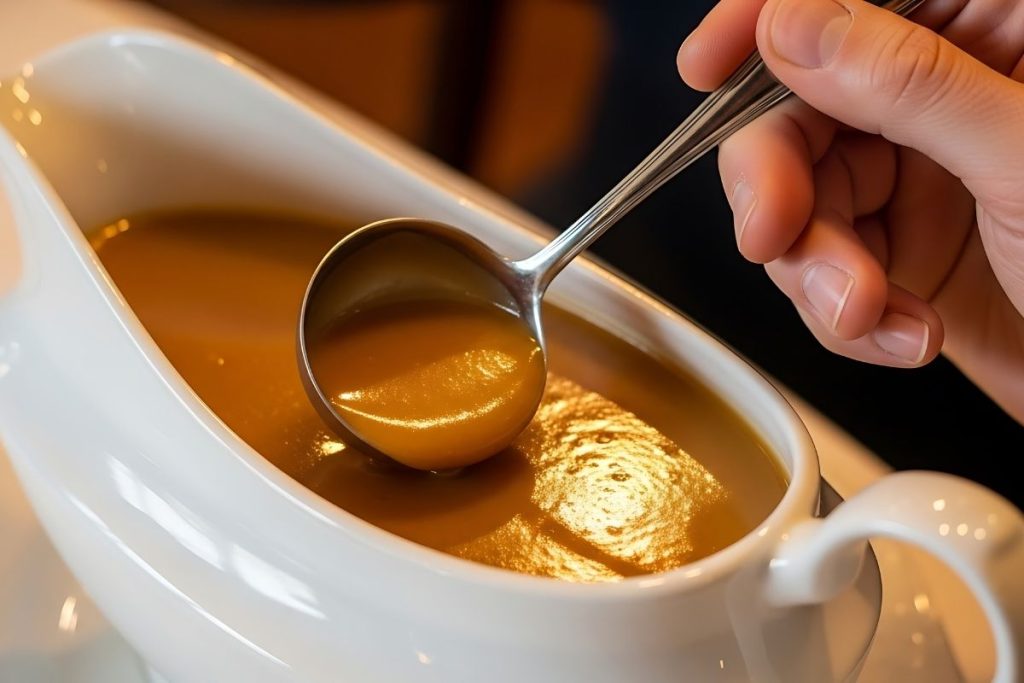
- Use the reserved cooking juices to make a classic turkey gravy or pan jus.
- Serve with traditional sides: roasted vegetables, stuffing, cranberry sauce, or mashed potatoes.
- For a crispier skin, you can broil for the last 2–3 minutes instead of a full oven roast — just watch closely to avoid burning.
FAQs
Q: Can I use a frozen turkey for this sous vide method?
A: It’s possible, but not recommended for this spatchcock method. Thawing first ensures the dry-brine and bag sealing work properly.
Q: What size turkey works best?
A: An 8–12 lb turkey fits comfortably in a large sous vide bag and cooks evenly in 6 hours. Larger birds may struggle to stay submerged or seal properly.
Q: Can I finish the turkey on a grill instead of the oven?
A: Yes — after sous vide cook and ice bath, you can crisp the skin over high heat on a grill. Just monitor carefully to avoid flare-ups.
Q: How long can I wait between sous vide and roasting?
A: After the ice bath, you can refrigerate the turkey sealed for up to 24 hours and then roast when convenient. This makes it great for timing a holiday meal.


Assuming you didn’t go excessive with the salt, could you vacuum seal it right after you apply the dry brine so that you could just wake up Thanksgiving morning and drop the turkey in the sous vide bath and then go back to bed for a few hours?
Hi Chris, as long as you are putting on an amount of salt you feel comfortable eating then this method should work!
Chris I've been sous vide cooking for a few years now but haven't done a turkey. I usually smoke my turkeys. Instead of finishing in the oven can I put it on the smoker for awhile to finish and get a smokey taste and still be golden?
Hi Jason. Can you give me the time and temps for doing a 20lb Turkey? Also, can I complete the sous vide portion of the recipe the day before serving and complete the roasting portion on Thanksgiving day? If so, at what oven temperature and how long to heat? Thanks for this recipe.
Hi Terri, I would do 150F for 10-12 hours for that sized bird. Also, you can do the sous vide the day before, refrigerate, then roast the next day method, but this could slightly impact the texture and juiciness of the turkey. If possible I'd try to sous vide, ice bath then roast immediately, but if it's not possible the other method still works. I'd still do 500F for 30 minutes to heat the turkey back up and get a nice golden sear, but use a meat thermometer to double check on the internal temp.
I’m cooking a 5 lb bird. My instant pot has the Sous vide option. How long shoukd I cook it?
Hi Emily, I'd still do 6 hours for a 5 lb bird!
Hi Jason - thanks for the great instruction; I looooove to use my immersion circulator for so many things. I deboned a 23# turkey two years ago (terrfying - never again) and cooked roulades, dark and white, separately. Came out great but never again. Anyway, you have inspired me to spatchcock this year. I have a 15# bird and was thinking eight hours at 150F. Tnoughts? Cheers,
Kimi
Hi Kimi, wow you are braver than I deboning an entire turkey for a roulade! I think 8 hours at 150F will be perfect. Have a fantastic Thanksgiving and enjoy!
Hi guys! Loving the idea to spatchcock the turkey and sous vide. Instead of a dry brine, do you think i could do a traditional brine and let it air dry before putting it in the bag to sous vide?
And how long would you suggest deep frying if doing that instead of roasting?
The short answer is the least amount of time in the deep fryer the better. So as soon as the skin is at your desired level of crispy, take it out.
Hi Chon, Yes a traditional brine would work as well! Rather than air dry i'd pat it dry with paper towels to speed up the process.
Can you explain why it is you must spatchcock to avoid filling the cavity/bag the turkey is in with liquid? Is it because of concerns with the turkey floating in the water? And if so- would a vacuum sealer avoid those concerns?
Thank you so much!
Hi Alyssa, you want to spatchcock the turkey so the meat cooks evenly and faster in the sous vide. I would recommend vacuum sealing the turkey whether you spatchcock or not.
If the turkey needs to reach 165F inorder to kill salmonella and other food born pathogens, how does cooking it in 150F water make the turkey safe to eat?
Hi Michael, the constant temperature over the long period of time that is common in SV actually kills food borne bacteria, so the same danger zone rules don’t apply.
Fantastic recipe! Was super juicy and tender, the family loved it. Thank you so much.
Will 2-gallon zip lock bags be large enough for a 12 lb Turkey? What if I don’t have a vacuum sealer?
Thanks!
Hi Thom, it should be large enough but it is hard to say for sure without seeing the turkey. Not having a vacuum sealer should be fine as long as the turkey fits in a 2-gallon ziplock, you would just use the displacement method to remove the air.
Could you possibly reply with the recipe for the cranberry dish you made? I’m going to sous vide my turkey but break down into white meat and dark meat portions.
Here you go! https://www.youtube.com/watch?v=4JlBfl99vGU
Hi there, thank you so much for this! If I sous vide a 22lb turkey in pieces (in separate bags) do you think I'd still need a 10-12 timeframe? Last year we used your recipe and had to start our turkey at 10pm the night before (instead of getting up at 2am) but it just did not turn out as well as our test turkey breast, which was done for 6 hours and was just as mouthwateringly delicious as you described yours being.
Hi Melinda, I think you could definitely reduce the cook time if you are planning on cutting the turkey into pieces and cooking them separately. I would recommend a 6 hour cook time in this case. Hope it turns out great!
Can I sous vide this a day or two ahead of time? If so, how would I bring it back up to temperature?
I also plan to sous vide a prime rib roast. So I'm trying to decide which one is better to do a day or two in advance. What would you do?
Hi Julie, yes you can sous vide a day or two in advance. To bring it back up to temperature you can put it in the oven, which will both heat it back up and brown the skin. I would also recommend cooking the turkey within one day of serving to maintain the quality of the meat. Regarding your last question, I would personally do the turkey one day in advance and prime rib the day of. Hope you enjoy!
Thank you so much Jason! Happy Thanksgiving!
Hey Jason,
Is there a joule bag on the market big enough for a 10lbs turkey that you know of? I have the Joule Sous Vide.
Thank you for your help!
Hi AJ, not to my knowledge, but you can use whatever bag you want no matter what sous vide device you own. I recommend FoodSaver bags as they are specifically designed for sous vide purposes.
How much Sous vide time for 15-16lb turkey?
Just finished eating - delicious! Probably the best Thanksgiving turkey I've ever had! Next time, I'll probably go a little heavier on the herbs, since I have a tendency to under-season my sous-vide meals.
I tried this method today, using a 5 dollar post-Thanksgiving deal turkey. I didn’t bother to dry brine it (just seasoned heavily, reasoning that it will basically brine itself as it cooks). I did spatchcock, and I used an extra large ziploc storage bag. Their company uses the same materials for all of their bags, so they are all sous vide safe. It cooked for a full 24 hours at 150F. I only rested the turkey at room temperature a few minutes until the oven was heated, then convection roasted ten minutes until deep golden brown.
It is absolutely spectacular. Crisp skin, tender meat throughout. I know a took a lot of shortcuts, but I figured I’d report back that this recipe handled these hacks perfectly!
Amazing! Thank you for sharing your hacks and success!
Thanks very much for commenting - especially the part about the end about going direct to oven (convection) roasting out of sous vide. I’m doing 2 birds, one traditional spatchcocked and a (slightly) smaller sous vide for extra meat so that’ll let me quickly roast/brown the sous vide one off after I pull the bigger roasting bird out and am resting it.
First off, my husband and I are huge fans of sous vide cooking but we’re still newbies (never had an issue yet, always turns out great) and want to try for the first time doing our 12lb Thanksgiving Turkey this year by sous vide. Would you definitely recommend spatchcocking the Turkey? If we don’t spatchcock, does the cooking instructions from this recipe change at all? Last-how long should we sous vide a 12lb turkey? Happy we found this recipe, Most others said to cut the Turkey up into parts-we really wanted to keep it whole!
Hey Jenna, thanks for reaching out! I would definitely recommend spatchcocking the turkey. Mainly, it will give it a much more even cook, make it easier to brown, and will be a much shorter cook time. 6 hours will work with that size turkey, but feel free to go up to 8 hours. Enjoy and happy Thanksgiving!
This turkey was outstanding. Going to use the sous vide every year!
Hi, I'm trying this for Thanksgiving (slightly different brine, but not relevant).
I squeezed a 12lb bird into an 11- or 12-inch expendable bag. My concern is that, while I spatchcocked it, it doesn't lay flat at all like I'd expect and looks like a large round turkey. The recipes I saw that didn't spatchcock took a lot more time to sous vide (like 18-24 hours). Given that it looks like a full-sized round bird, is 6 hours enough?
And is there a downside to doing it for, say 14-16 hours? (usually Sous Vide has a range, and I'd rather put it in the night before)
Hi there! For a six lb Turkey would you recommend less than 6 hours ?
Question: will a 12 lb turkey fit in a 12 quart container?
Followed this exactly for our 15 lbs turkey. The only thing we came across was having to ditch last minute our container because it didn't fit the turkey!
Delicious, super moist, and delicious. I wish there was a way around the smoke while roasting it. I used the melted butter.
Thank you!
We've done this recipe three times now! Great results each time. Now we're experimenting with different seasonings, but it's always tender, succulent and so good! Never cooking Turkey any other way!
Thank you for this recipe! Ended up having to deviate in two ways from it and was wondering if you could explain how they might have affected the outcome.
Did the dry brine for an extra 24 hours due to having to go out of town and cut legs and wings off and put those pieces in a separate sous vide bag in order to get it to fit after my make-shift larger bag couldn't hold the vacuum.
There was no "excess salt" to brush off and the bird was brown after only about 15 minutes in the 500 degree oven, although I left it in for the full thirty minutes.
The white meat ended up ok, but the dark meat was much drier than I'm used to. Definitely willing to try again the correct brine time and proper bag, but curious if those changes explained the outcome?
Hi Pete, I think it was likely due to the over-brining but it is possible 30 minutes at 500 was too long and dried out the bird. Next time I'd do two things - brine the suggested amount of time and also have an oven thermometer so once the turkey is browned and at serving temperature you can pull it.
How long do you shock the finished sou vide turkey for? Until when it’s completely cool to the inside? If you are completely shocking in ice bath until completely cooled, when broiling it to brown, does it take longer now because we have to make sure the meat is hot all the way through?
If I spatchcock and then cut the bird in half and bag it separately, is it possible to rejoin it after and tie it to a rotisserie or will it fall apart?
Hi Adriel, Great question! Once you spatchcock and then cut the turkey completely in half, it’s going to lose a lot of its natural structure. After sous vide, the meat will be very tender, so trying to “rejoin” the halves and tie them onto a rotisserie usually won’t hold together well—it will likely fall apart during roasting.
If you want to use the rotisserie, it’s best to keep the bird whole (spatchcocked or not) and cook it that way. Another option is to cook the halves sous vide, then finish them separately in the oven or on the grill to crisp the skin—this way you get the same effect without needing the rotisserie.
Let us know how you go! Can you believe it’s almost time for Thanksgiving already!?!
Update: we sous vide'd a WHOLE TURKEY!! https://sousvideways.com/how-to-sous-vide-a-whole-turkey/
Adriel! Guess what! We nailed the recipe and sous vide a whole turkey! We used a small one and the displacement method and it worked great! Juicy, mouth watering whole turkey that you can carve at table! Let us know if you give it a try! https://sousvideways.com/how-to-sous-vide-a-whole-turkey/ Have great day! Ali & The Sous Vide Ways Team :)